Posts

Showing posts with the label All That Glitters

Joy + Holiday Magic - Clear Cardstock Ornament Tags | Delicate Series

Image
I love, love, love the idea of clear tags! You never have to worry about matching wrapping paper, because everything goes with these. I sometimes find, if I make my gift toppings too early, my style changes, or I find just-the-perfect wrapping paper, that throws off the whole wrapping thing. Which is why these tags are such a fave. They work with everything form simple kraft, to elegant, sparkly designs. And the recipient can even use them as ornaments, long after the gift-giving has passed. To make these sweet tags, I used an oval die, but you could use any shaped die you have, along with some sentiment stamps, versamark ink and embossing powder. ____________________________________________________________________ TIP: HEAT-EMBOSSING ON ACETATE Using heat-resistant acetate helps to ensure your clear tags don't buckle or melt while you emboss!  It's also especially important to use your non-static pouch before stamping, as without this step, acetate can gather a lot of static ...

Joy to the World - Papertrey Ink | CAS Geometric Design

Image
Hello Friends! I couldn't resist. Back again today with another CAS Challenge: Geometric Design! Who would have thought I'd have so much fun with clean and simple cards! Over the last few days, we've been covered in a thick fog, and a blanket of the most magical, enchanting hoar frost. Each day the layers build up and today I see out my window the most beautiful white trees and crystals hanging off our twinkly lights. It really does look like a winter wonderland! Which is a perfect inspiration for my card today! For today's card, I wanted to create a focal point, and then use a geometric, repeating design to add a little more interest. I started this card by adding a super glittery, sparkly wood snowflake to the center. I used Gold embossing powder , mixed with Silver Halo glitter  (it is no longer available on SB.com, but you can find it here ). It creates this ultra-vintage-y sparkle that is simply irresistible! Atop that, I layered a white-embossed snowflake, decke...

Sending a Little Holiday Sparkle - Papertrey Ink | Elongated Tags | Christmas Cookie Recipes

Image
One of our favorite Holiday traditions is finding new cookie recipes to make and share with friends. Usually, hubby and I each pick 4 recipes, and spend the weekend baking, tasting, and decorating packages to deliver some *happy*! This year, however, we've had to be mindful of just how much I can take on, so we decided to pick just a few recipes that are quick and easy, to keep our little tradition alive. I'm sharing recipe links below, and a few notes on the tweaks. But the real star of today's post is actually the packaging! It was so easy and fun to pull together! And since I don't have the energy I once did, making all the packaging from scratch seemed like quite the feat. Instead, we found several packaging options, and decided to just focus on making the tags. We found these adorable treat boxes at a local craft store, and we've also picked out a few larger boxes at our local Michael's. ____________________________________________________________________ T...

Holiday Wishes - Altenew + Papertrey Ink | No-Mess Glittering | Delicate Series

Image
As many of you. we've started receiving some Holiday happy mail and I couldn't be more thrilled to open my mailbox every morning. Can we please have Christmas mail surprises all year long?! In light of the increased mail action, I thought it would be fun to do a Delicate Series project that is a teensy bit related to this and will hopefully be helpful in your holiday crafting! First I need to ask...Does anyone else get a little squirm-ish when a card sheds glitter everywhere?! I loooove things that sparkle and shine, but if it makes your house look like Santa's workshop, and you're picking itty bitty twinkles off everything from your cat, to your hubby's work clothes (lol), you gut-wrenchingly know that card just might be going back into the envelope! Since I don't think that any card deserves such a harsh punishment, I'm sharing my favorite way to avoid this situation! (To be honest, that would never, ever happen around here. It just might reside on a high ...

Sending a Little Joy - Altenew | Stretch Your Dies

Image
Hello Friends! I mentioned I'd be back with the beautiful Altenew alphas. This time around with a sparkly, glittery take, that features a negative inlay and a fabulous way to stretch these fantastic dies! To start my card, I used the pretty Caps Bold alpha dies to create a negative cut-out of my focal point.  I've been loving the word 'joy' and I've chosen it as my go-to for this Season's cards. You'll see a few more cards with it yet to come. ______________________________________________________________________ TIP: FAUX INLAY LETTERING To accentuate the negative die-cuts, and create the look of inlay lettering, rather than actually embossing each letter, you can use a cardstock base covered with a sticky double-sided adhesive sheet . For a two-tone look, use a piece of cardstock to cover the lower portion of the now-sticky paper, as you apply the embossing powder.  Then simply add a mixture of gold, pink, white and glittered embossing powders to create ...

Peace + Joy - Wplus9 | Delicate Series

Image
Hi everyone! I hope you've all had a splendid Thanksgiving, enjoyed with family and friends, and all the turkey you can eat! Even though North of the border, our Thanksgiving tradition falls a lot earlier, we still partake in one of the biggest shopping days of the year, so I've compiled below a little list (it was hard , but I narrowed it down to ONLY 4 shoppes) of my favorite BFS happening through the weekend!  And I'm sure, just like me, after all the shopping frenzy, you might need some peace and quiet in your life, and what better than some alone time with Copics and this Beautiful Bouquet floral stamp!  I also thought it would be fun to start a new card series on the blog: Delicate.  I've been straying a little from this style. So this is my way of getting back to it and sharing a few soft + feminine cards with you all.  To start this card, I first stamped the beautiful floral and embossed it in silver. I knew I would eventually add silver glittered accents, s...

Let It Snow - Altenew | Snowy Vellum Background

Image
Helloooo Friends! I've got a  winter-wonderland-of-a-card to share with you all! I was inspired by the beautiful flakes outside and wanted to create something just as soft and delicate. I've also been itching to use this little deer cutie and I'm so happy to finally share him with you :) To start this card, I adhered some aqua and white polka dot paper onto a card base.  I then used various snowflake stamps to stamp my background with Versamark ink , and white embossing powder to emboss all the flakes. A background stamp like this one would work wonders here! After embossing, I added iridescent rhinestones and Nuvo drops to create a twinkling effect. I used white cardstock to back the vellum. I found that the snowflakes were competing with the aqua background a little too much for my liking. I then added a frame of greenery and adhered these layers onto my card base. Lastly, I stamped and die cut this sweet little deer, using Altenew's Modern Deer stamp and die set.  *...

You Make My Heart Happy - A Card for My Mom

Image
It's been a few weeks now, but I've wanted to share this post for some time and I'm finally getting around to it. I created this little card for my mom. She makes my heart so happy.  Over the past year, my health challenges have made even the simplest of tasks impossible at times. Things like cooking, cleaning and general everyday stuff.  We all know how things like this can pile up when not done for a week or two, or even a month or two. But going on a year, I was starting to feel overwhelmed at the sheer amount of life stuff that had mounted. It seemed like every corner of our house (and our life) needed attention, but I could only give so much and I was at a loss of how to tackle it all. My sweet mom, without hesitation, offered to come and help. So, a few weeks ago, she visited and spent an entire week with me, helping organize, clean and sort everything out. I was fortunate to have a couple of good days and even joined in on the cleaning (and even got back into cooking...

Wishing You a Wonderful Thanksgiving - Autumn Cards with Non-Traditional Colors

Image
Our Thanksgiving is approaching quickly, yet I'm still in a very Summer-y state of mind.  So I thought it would be fun to adapt a colorful palette just a bit and bring out some Autumn accents. The first thing I think of when cooler weather approaches is chunky, cozy layers, and this lovely canvas base is the perfect way to add a bit of textured cozyness to my card. But keeping in mind fresh floral hues, I also added two patterns in feminine colors: this pretty Pinkfresh print , and this sweet floral print. For the topper, I added a striped bow ( DIY tutorial here ), and also a sweet vintage button. I stamped a portion of my sentiment using Purls of Wisdom stamps from Papertrey. They are discontinued, but since this is such a generic saying, it would be really easy to use an alternative. I really love adding a touch of sparkle to holiday cards, so I used a really delicate font to die cut a gorgeous glitter cardstock . I prefer to use cardstock when working with such fine details, as...

Queen and Co. Merry and Bright Ornament Kit - What to Do with Shaker Leftovers

Image
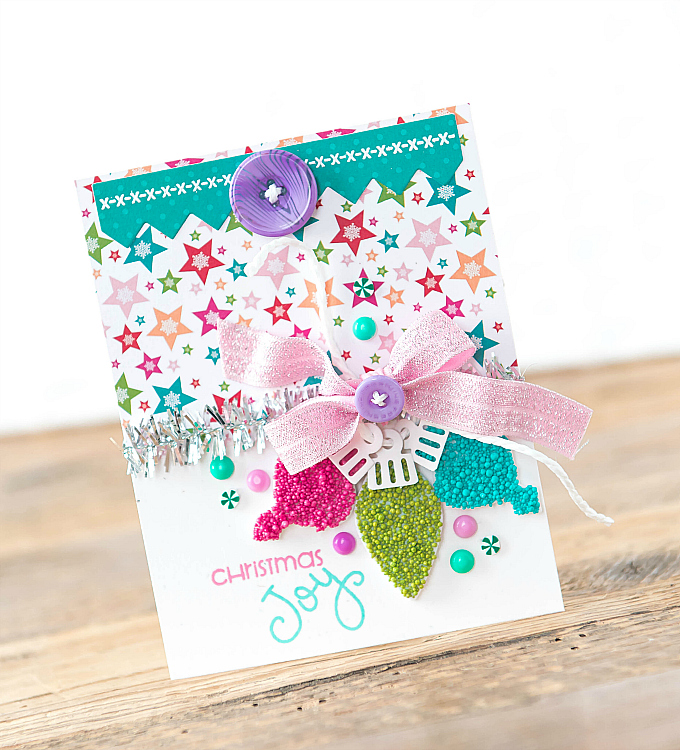
Hi Friends! How are you all doing? I hope you're having a splendid Autumn so far! We've had some cooler days - which has been a welcome change. I've been playing in my craft space quite a lot these days and it feels wonderful! For today's card, I used the Merry & Bright Ornament kit , and this time around I did a bit of a different take on the shakers ;) In every shaker kit, you will find foam adhesive that is perfectly pre-cut to make shaker assembly super easy and fuss-free. What I love the most about these, though, is that the inside foam leftovers can be made into beautiful accents! After assembling a card I featured earlier this month , I had a pile of leftovers, and decided to use the inside bits for this next card. To start, I decked the top of the card using the festive star print, and teal  dots from the kit, cut with PTI's  Banner Border  dies. I stamped and embossed a stitch detail at the top, and added a gorgeous purple button.  I used some tinsel tr...